
Hope everyone had a great Christmas! I went out for dinner at Munch in TST with A and G, then checked out G's new pad where we had a German riesling paired with crackers spread with chili crab dip, spring onion dip, camembert cheese and salmon pate. AND blueberry cheesecake... all while watching Borat and this year's Victoria's Secret Fashion Show. It was fun and filling. :P
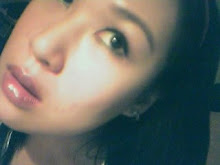
I didn't have time to do much makeup because I was in a mad rush.Blurry phone pic cuz we started rushing for the elevator
 Eiffel tower for A!
I want more presents! Gimme gimme more See? I was nice...not at all NAUGHTY

FOTD See? I was nice...not at all NAUGHTY
Face
Cover FX Mineral FX SPF 15 foundation
Shiseido Inoui the Enhancer concealer
Baby Pink cheeks jelly in furaku pink (I think that's what the color is - it's in Japanese)
Cover Girl cheekers blush in illuminous blush
Coty Airspun loose face powder in luminous translucent
Eyes
Prestige browliner in Earth Brown
Bobbi Brown eyeshadow in Navajo
Rimmel extreme definition two tone eye definer in fashion icon (I only used the black side)
L'oreal le kohl eyeliner in platinum
Majolica Majorca curl, curl, curl toward the sky eyelash primer
Estee Lauder Illusionist mascara
Darkness falsies
Lips
Calvin Klein lipstick in berrywood
MAC tendertone in pucker
False eyelash clip tutorial
I used to put on my falsies with my hands and use the end of a tweezer to push them into place, but since I've been more aware of beauty knick knacks lately, I decided to pick one up.
Tuke-matuge clip

Directions:
1) Squeeze eyelash glue into the cracks (the shiny part is the glue I didn't peel off from the previous use)

 3) Clip the falsies close to the base -
4) Place as close to your lashline as possible and hold about 10 seconds.
 Pros
Pros- Easy to control the amount of glue (just fill the cracks)
- Adjusts the falsies closer to your lashline, and good when the falsies have lost some of their shape
- Less messy when readjusting (glue doesn't go everywhere)
- May still need minor readjustment
- Have to peel off the glue from the cracks and clip (well, I do it every time)
- Costs HKD26 lol
It's definitely more foolproof for falsie newbies and those cursed with shaky hands, plus I hated how glue went everywhere when I readjusted the falsies too much when I used to do it freehand. Thumbs up!
3 comments:
HAPPPPPPPPPY NEWWWWWWWWW YEAR BABY!!!!
why hello Gorgeous!
wooooooooweeeeeee all the way from HOng kong...oh how i miss that place...won-ton mein...hainese chicken and rice...fish balls on the street...and talking to people in my broke ass chinese hahah...oh and SASA..SIGH* i must revisit soon...
i hope you had a happy new year and its not over for us...RED ENVELOPES galore sooon!
xo
you look GORGEOUS! i love the pics. & i always try to put in fake lashes but they never stick on straight :( i have given up lol.
pink: you should come visit, I'll take you partying HK style...you won't go home till 7am!
can't wait till CNY, gotta get that paper cuz I'm a broke mutha haha
legendury: thanks sweetie!! you should definitely try again, I gave up the first few times when I tried it during univ, but I picked it up again in 2007 - it just takes some practice...try that clip I reviewed, it definitely helps. AND use eyeliner before putting the lashes on cuz then you don't have to align the lashes perfectly and nobody will notice! ;)
Post a Comment